Difference between revisions of "Maps"
(→Map 2 - Woofferton to Kidderminster: OS Map confirms siding was beyond the entrance to the Shed) |
m (→Map 1 - Shrewsbury to Hartlebury: edit links) |
||
| Line 119: | Line 119: | ||
[[File:BSicon DSTlocal.png|25px]] [[List_of_signal_boxes#List_of_historical_Signal_Boxes_and_Ground_Frames|Brindley Street Siding]] | [[File:BSicon DSTlocal.png|25px]] [[List_of_signal_boxes#List_of_historical_Signal_Boxes_and_Ground_Frames|Brindley Street Siding]] | ||
<br/> | <br/> | ||
| − | [[File:BSicon_ABZlglocal.png|25px]] [[ | + | [[File:BSicon_ABZlglocal.png|25px]] [[Burlish Branch]] |
<br/> | <br/> | ||
[[File:BSicon_BHFlocal.png|25px]] [[Stourport]] | [[File:BSicon_BHFlocal.png|25px]] [[Stourport]] | ||
| Line 125: | Line 125: | ||
[[File:BSicon_ABZrflocal.png|25px]] To [[Stourport Power Station]] | [[File:BSicon_ABZrflocal.png|25px]] To [[Stourport Power Station]] | ||
<br/> | <br/> | ||
| − | [[File:BSicon DSTlocal.png|25px]] [[ | + | [[File:BSicon DSTlocal.png|25px]] [[Leapgate Private Sidings]] |
<br/> | <br/> | ||
[[File:BSicon_ABZrglocal.png|25px]] [[Hartlebury Junction | Hartlebury Jct]] (To [[Kidderminster]]) | [[File:BSicon_ABZrglocal.png|25px]] [[Hartlebury Junction | Hartlebury Jct]] (To [[Kidderminster]]) | ||
Revision as of 15:42, 31 October 2018
Schematic Map of the preserved SVRSevern Valley Railway
|
|
Schematic maps of the pre-closure SVRSevern Valley Railway
Map 1 - Shrewsbury to Hartlebury
|
|
Map 2 - Woofferton to Kidderminster
|
|
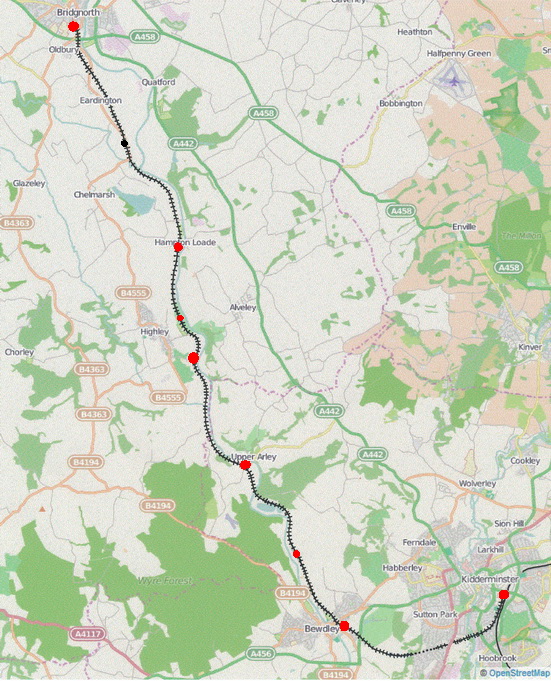
Geographic map of the preserved SVRSevern Valley Railway
Click on any station or station name to go to that station's page.