Difference between revisions of "Sandbourne Viaduct"
(additional info) |
(Reordered text and added links) |
||
| Line 1: | Line 1: | ||
[[File: Bridge_9_20150606.jpg |thumb|200px|right| Sandbourne Viaduct from below]] | [[File: Bridge_9_20150606.jpg |thumb|200px|right| Sandbourne Viaduct from below]] | ||
| − | Sandbourne Viaduct, also referred to as Bewdley South Viaduct, | + | Sandbourne Viaduct (Bridge 9), also referred to as Bewdley South Viaduct, is situated only a few yards from the [[Bewdley Bypass Bridge]] and is 101 yards in length, with 10 brick arches of 25ft span built on sandstone piers. |
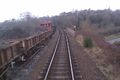
| − | On the approach to Bewdley, 'The Loop' from Kidderminster and the original Severn Valley Line from Hartlebury ran side by side over the viaduct, and both sets of tracks are still in situ. SVR trains travel on the former, which is on the side further from the Severn and Bewdley Town Centre. The latter carries no passenger traffic, but sees frequent use as a siding to hold wagons and engineer’s trains. | + | On the approach to [[Bewdley]], 'The Loop' from [[Kidderminster]] and the original Severn Valley Line from [[Hartlebury]] ran side by side over the viaduct, and both sets of tracks are still in situ. SVR trains travel on the former, which is on the side further from the Severn and Bewdley Town Centre. The latter carries no passenger traffic, but sees frequent use as a siding to hold wagons and engineer’s trains. |
<gallery> | <gallery> | ||
File: Bewdley bypass bridge south.jpg | The Bypass Bridge (metal parapet) and Sandbourne Viaduct (stone parapet) | File: Bewdley bypass bridge south.jpg | The Bypass Bridge (metal parapet) and Sandbourne Viaduct (stone parapet) | ||
Revision as of 19:08, 11 June 2015

Sandbourne Viaduct (Bridge 9), also referred to as Bewdley South Viaduct, is situated only a few yards from the Bewdley Bypass Bridge and is 101 yards in length, with 10 brick arches of 25ft span built on sandstone piers.
On the approach to Bewdley, 'The Loop' from Kidderminster and the original Severn Valley Line from Hartlebury ran side by side over the viaduct, and both sets of tracks are still in situ. SVRSevern Valley Railway trains travel on the former, which is on the side further from the Severn and Bewdley Town Centre. The latter carries no passenger traffic, but sees frequent use as a siding to hold wagons and engineer’s trains.
The Bypass Bridge (metal parapet) and Sandbourne Viaduct (stone parapet)

See also
Towards Kidderminster
List of infrastructure
Towards Bridgnorth